

Wednesday, February 29, 2012
Mermaid dress with rhinestones
I'm not 100% happy with the outcome of this dress. I really want a dress form because that would help, but they don't make them small enough to fit me. I have a mannequin but the demensions are off again, because it has huge shoulders. So anyhoo practice makes perfect but here's what I made. I was really excited to find the rhinestone chain at Hobby Lobby and I sewed it on by hand. As I write this, I'm waiting for an emulsion sheet to dry in the hopes of having my first successful screenprint! Fingers crossed. Oh boy....

Wednesday, February 22, 2012
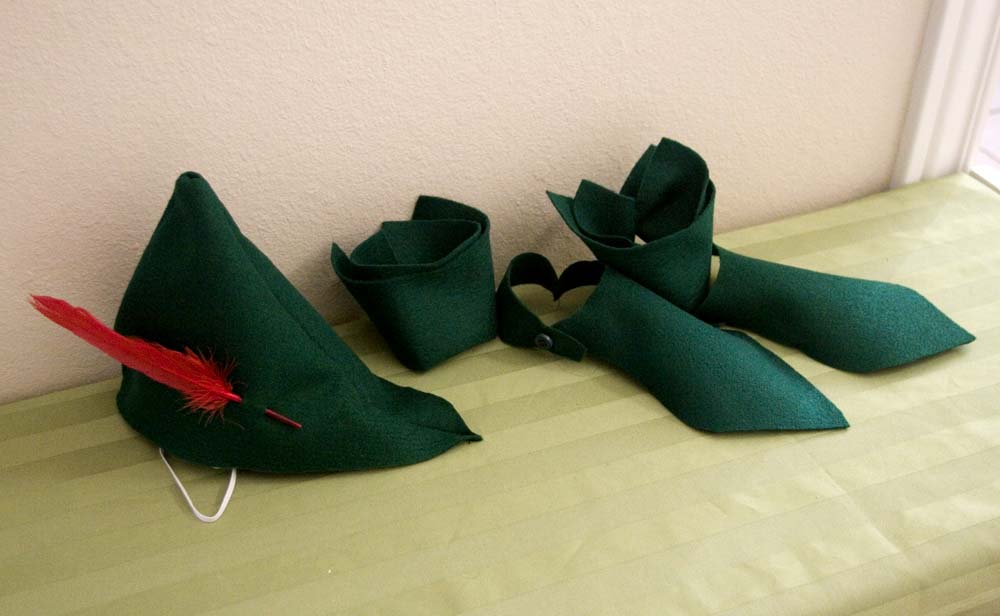
Custom Order: Peter Pan
I've just completed a custom order that I really enjoyed making. I recieved a request from a mother whose daughter will be playing Peter Pan in their local community production. I made a Peter Pan hat with an elastic band, cuffs and shoe spats that will look like Peter Pan's slippers, but allow the soles of her dance shoes to grip the stage. I am very happy with how everything turned out. I hope they will be a hit on stage. I love, love, love the story of Peter Pan.

Monday, February 20, 2012
How to make a cloth purse and bag.

1. Start with your choice of fabric folded right sides together. A 1/2 yard should be enough. Measure how big you would like the bag to be and cut fabric.

2. Sew the side together. The fold of fabric should be on the bottom of the bag. Leave the top open.

3. Fold under the top of the bag all the way around and sew hem.

4. With what is left of your fabric, still folded together, cut narrow, straight straps.

5. With right sides together, sew straps along edge. Leave top and bottom open.

6. Turn straps right side out.

7. Fold edges in side and sew closed at each end of both straps.

8. Sew straps to bag at hem on inside of bag, and reinforce as shown.

9. Turn bag right side out and voila!

Saturday, February 18, 2012
Home Decor Update
Well we added some more to the living room and I think it makes a big difference in bringing the whole room together. I made the ties around the drapes as well as the drapes. The pillows were a gift from codename: Tupac.


P.S. I've also been very busy on my etsy which is great! I'm frustrated that I don't have more time to sew because this month sales have been consistant and I would really not like that to stop.
Monday, February 13, 2012
St. Patrick's Day Men's Gettin' Lucky Pajamas
These men's pajama pants are my newest creation. The theoretical fly has the words: gettin' lucky embroidered on it.

 For Sale: http://www.etsy.com/listing/92940596/st-patricks-day-mens-pajama-pants-gettin


Wednesday, February 8, 2012
St. Patrick's Day "Pinch Me" Skirt
St. Patty's Day is just around the corner as I'm sure you're all preparing. And of course we celebrate mainly by dressing up like leprecauns and getting drunk. Of course you need this clover covered skirt inviting that shy stumbling drunk to pinch you on ur bootie. He could be the man of your dreams.


Monday, February 6, 2012
Our Humble Abode...
My roommate and I recently purchased some more furniture/decor for our home. We still have a bit further to go but here's the progress:
In the entry way
Colors-green, white and brown
Hooks- Cost Plus
Bench-repainted by me
Cushion Cover-also by me, fabric purchased at Home Fabrics(same as drapes)
Mirror-already had

 Now all we need is some artwork for the walls and pillows to bring the whole room together! I forgot to take pictures of the kitchen. I need to make a table runner for it, so I'll share that after I do it!
In the entry way
Colors-green, white and brown
Hooks- Cost Plus
Bench-repainted by me
Cushion Cover-also by me, fabric purchased at Home Fabrics(same as drapes)
Mirror-already had

In the living room
Colors- green, brown, tealThrow-Pier 1
Candle Piece Above Fire Place-Pier 1
Shelf-Target
Drapes-made by me with fabric from Home Fabrics & Rugs and Grommets from Joann Fabrics
Curtain Rod-Ross
TV Stand-Target
Wicker Trunk-Pier 1
Rug-Lowe's
Couch, Love Seat and Chair-JCPenny's

Orvis Dog Photo Contest For A Good Cause
"How we treat animals in captivity reflects on our views of ourselves and our humanity. How we treat wild nature gives us insight into whether we are going astray in our dealings with the rest of the natural order."-Eugene Linden

I recently entered Felipe in the Orvis Dog photo contest. Every vote costs $1.00 and the proceeds go to cancer research for dogs. (Which may also benefit humans.) So upload your own or vote for a good cause :0) Felipe's link is below:
Friday, February 3, 2012
Easy DIY Valentine's Day Pouch
This pouch will hold candy or jewelry for an easy no wrap presentation:

Step 1: Start by measuring the size which you would like the pouch to be. I used a 4 inch zipper and left a bit of extra fabric on the edges to compensate for seams. Note: Position your measurements on the fold of fabric so that the bottom of the pouch will be where the fold is.

Step 2: After marking and pinning fabric where you choose, make the cut.

Step 3: Repeat Step 1 on the wrong side of fabric that will be used for the outer layer.

Step 4: With inner and outer layers together, fold under edge and pin to zipper. Repeat for the other side of the zipper.

Step 5: Switch to a zipper foot, and attach the zipper.

Step 6: Turn the fabric inside out.

Step 7: Sew the side seams of pouch. Then turn pouch right side out.

Voila! You have finished your handy dandy pouch! Insert jewelry or other gift for your Valentine.


Subscribe to:
Posts (Atom)